立体視とは、左右に並んだ微妙に異なる2枚の画像を右目と左目でそれぞれ見ることで、奥行きのある立体的な画像が目の前に浮かび上がるというものです。平行法と交差法があり、どちらの方法で見るかによって2枚の画像の配置が変わったりします。今回は自分で立体視画像を作る方法について紹介してみたいと思います。
Stereopsis is the process of viewing two slightly different images, aligned left and right, with the right and left eye respectively, so that a three-dimensional image with depth emerges in front of the eye. There are parallel and crossed methods, and the arrangement of the two images may change depending on which method is used. In this article, I would like to introduce how you can create your own stereoscopic images.
seeneon
seeneonというソフトで、立体視したい画像と、高低差を色で指定した画像の2枚を読み込むことで、視差を調整した2枚の画像を出力してくれるというものです。作者さんのサイトが消失していたため、ここではアーカイブを載せておきます。
The software is called seeneon, and by reading in two images, one of which you want to stereoscopically view and the other of which you have specified the height difference in colour, it will output two images with the parallax adjusted. The author's website has disappeared, so the archive is posted here.
作者さんがソフトを公開していたアップローダーにはデータが残っていたので、ソフト自体は今でも使用できるようです。「[Download 1149833.zip]」というところをクリックするとダウンロードできる状態になり、その後の画面で「<ダウンロードする | click here to start download. >」をクリックするとダウンロードできます。自動的にダウンロードが開始しない場合は、「こちら」と書かれているところをクリックしてください。
現在の私の環境(Win10)でも問題なく使えましたが、十年以上前に作られ、更新されていないソフトなので、一応自己責任ということでお願いします。
The data was still available on the uploader where the author had published the software. The software itself still seems to be usable. Click on the "[Download 1149833.zip]" section to download the software, and on the subsequent screen click "<ダウンロードする | click here to start download. >". If the download does not start automatically, click where it says "こちら(here)".
I was able to use the software in my current environment (Win10) without any problems, but please note that this software was created more than a decade ago and has not been updated, so you do so at your own risk.
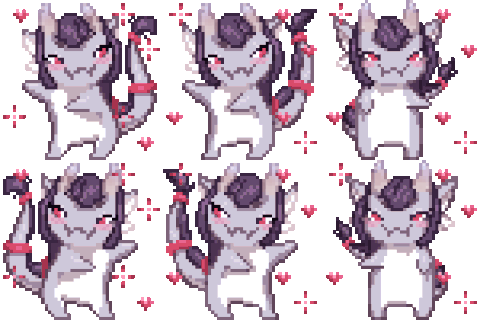
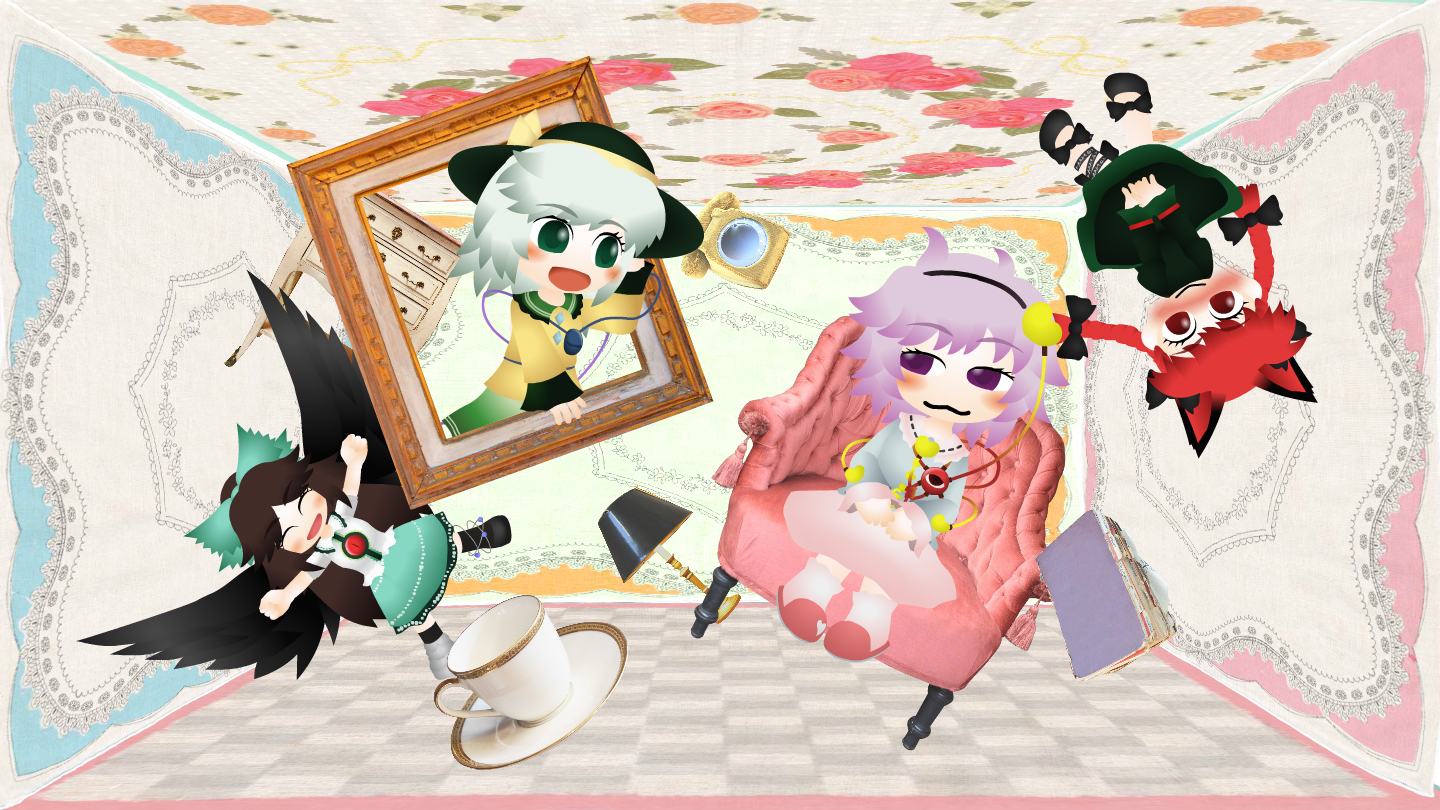
さて。例えば、この絵を立体視させたいとしましょうか。
Now. Suppose, for example, that you want to make this picture stereoscopic?
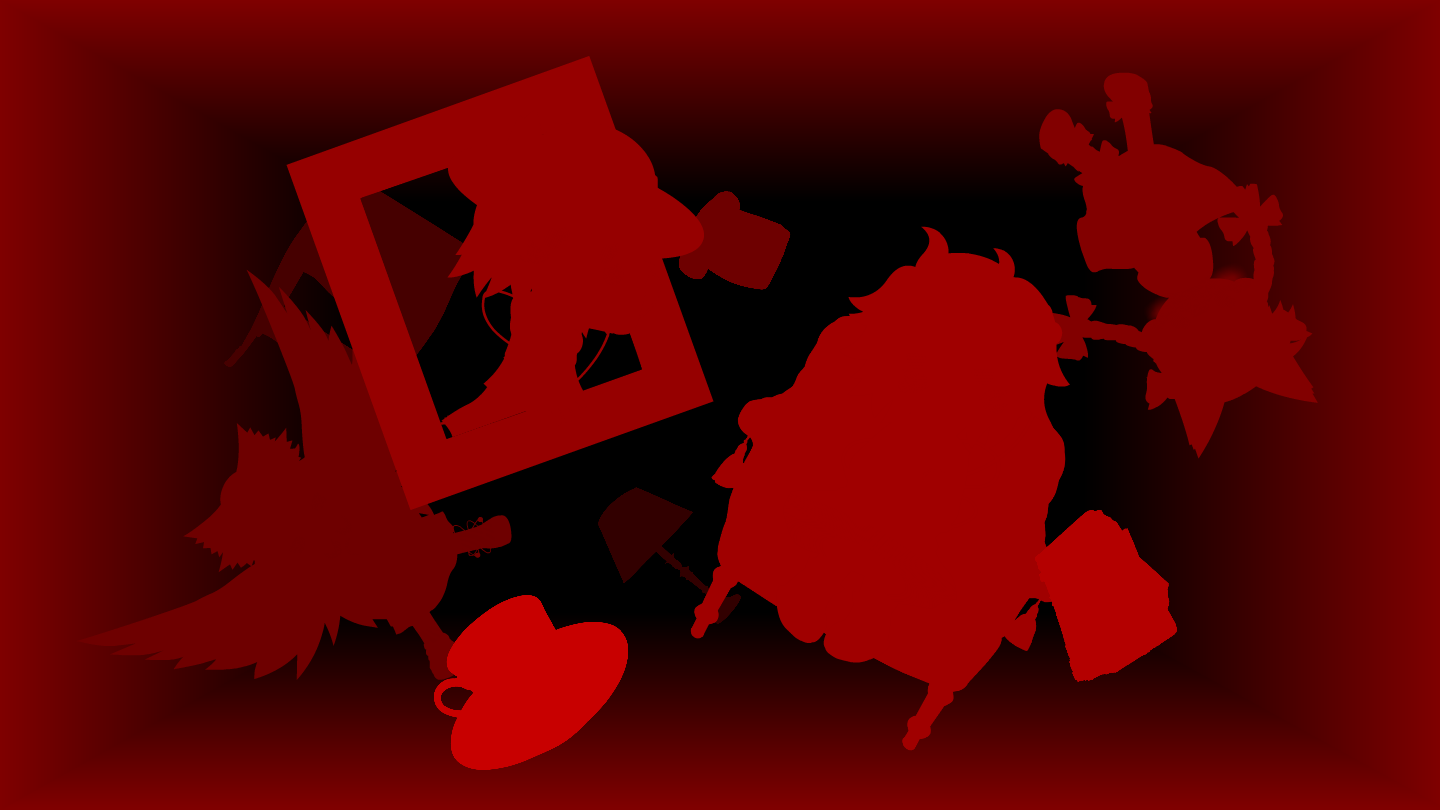
浮き上がらせたい部分を明るい赤色、 奥にしたい部分を暗い赤色にした高低差指定用の画像を作ります。各キャラクターなどがレイヤーで分かれていると比較的楽に進められますね。なお、設定により赤以外の色でもできるようです。
Create an image for specifying the height difference, with light red for the parts you want to float and dark red for the parts you want to be at the back of the image. It is relatively easy to proceed if each character and so on are separated by layers. It seems to be possible to use colours other than red depending on the settings.
こんな感じで作成します。
Create something like this.
色を指定するときには、ちょっとしたコツがあります。色を(R127:G0:B0)にしたものは、画面とおおよそ同じ位置の奥行きにあるものとして設定されるので、これを基準とすることです。ここからRの数値を増やすと画面の手前に飛び出します(明るい赤になり、255が最大値)。逆に、Rの数値を減らすと、その色は画面の奥に引っ込みます(暗い赤になり、0が最小値)。
There is a little trick to specifying colors. A color set to (R127:G0:B0) is set as being at approximately the same depth as the screen, so this is the standard. Increasing the R value from this point will make it pop out to the front of the screen (bright red, with 255 being the maximum value). Conversely, decreasing the R value will pull the color to the back of the screen (dark red, with 0 being the minimum value).
グラデーションを付ければ、だんだんと奥行きが変わる表現もできます。これら2つの画像をseeneonに読み込み、立体視画像を出力します。
By adding a gradient, it is possible to gradually change the depth of the image. These two images are loaded into seeneon and output as stereoscopic images.
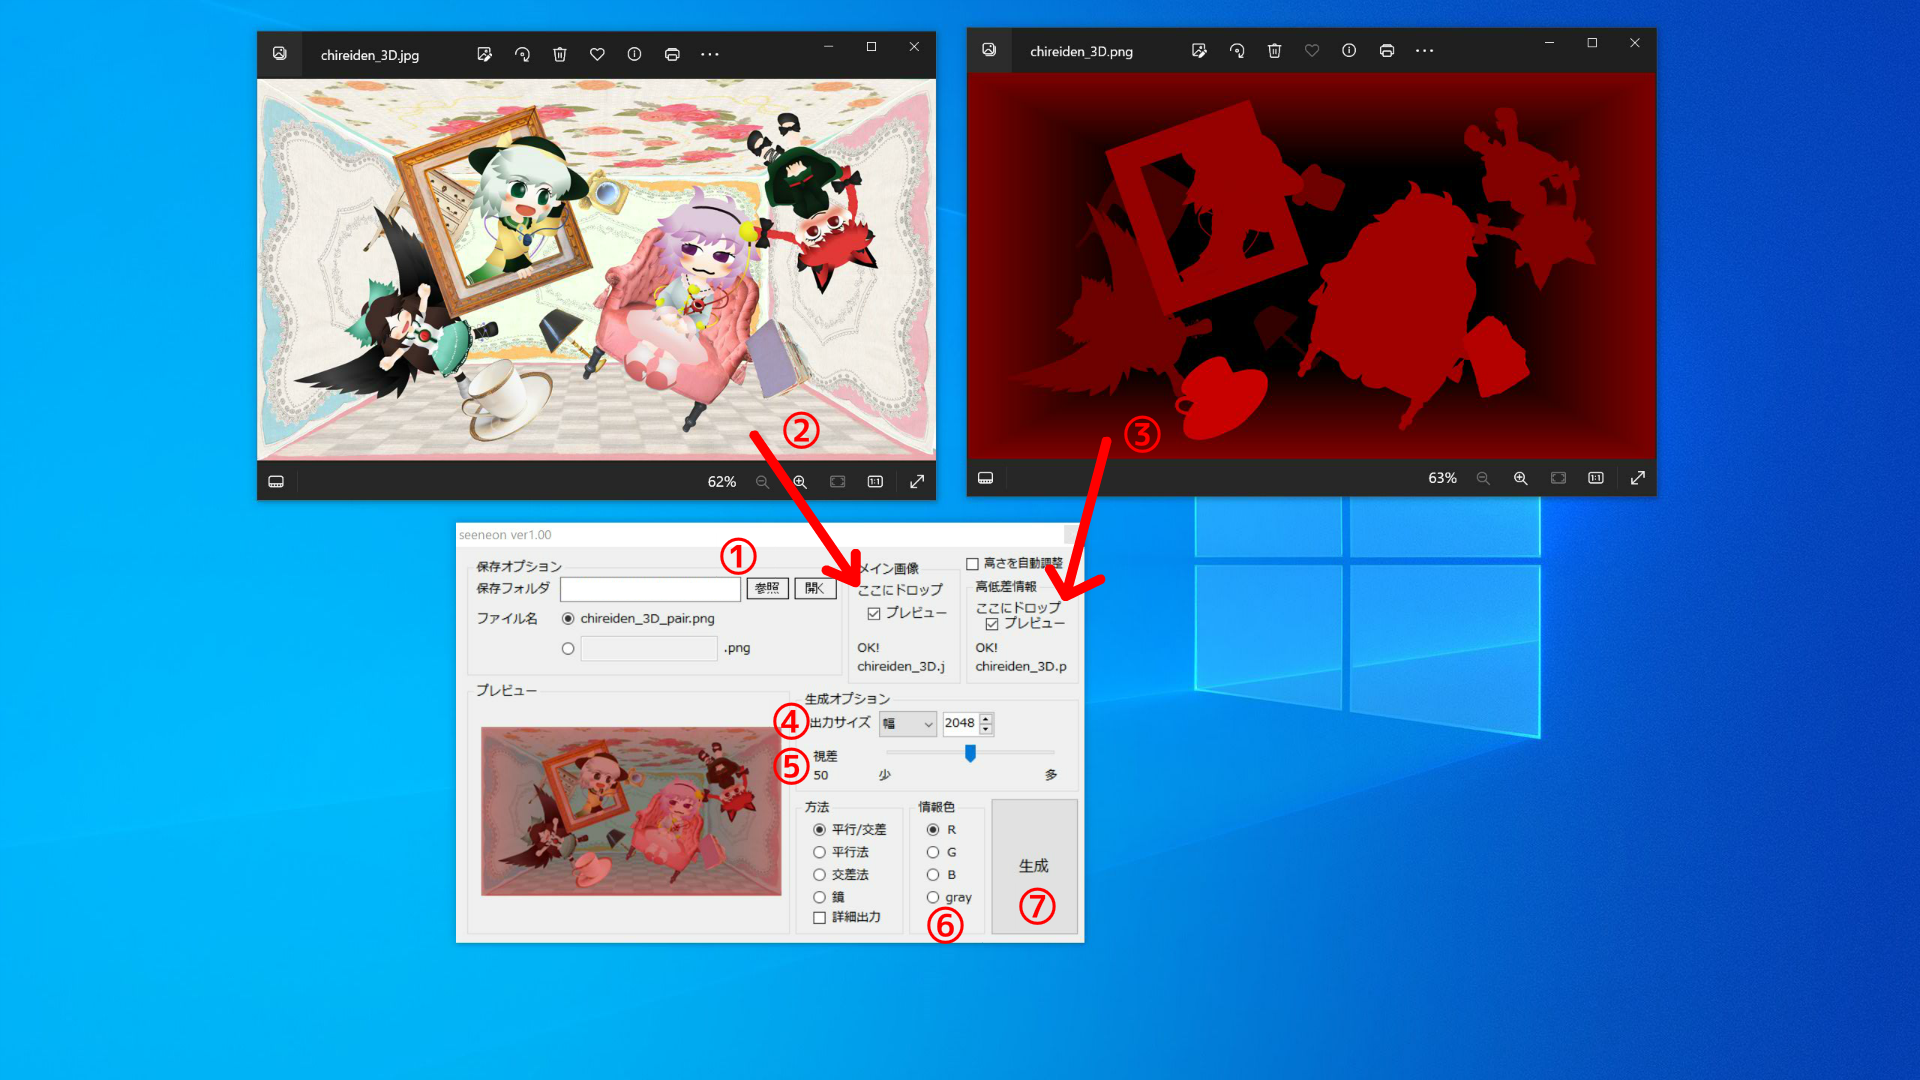
①生成した画像を保存する場所を指定します。
Specifies where the generated images are stored.
②立体視させる画像をドラッグ&ドロップします。
Drag and drop the image to be stereoscopically viewed.
③高低差指定用の画像をドラッグ&ドロップします。
Drag and drop the image for the height difference designation.
④出力するサイズを指定します。幅もしくは高さから指定できます。
Specifies the size of the output. Can be specified in terms of "幅(width)" or "高さ(height)".
⑤視差を指定します。右に行くほど奥行きや飛び出し方が大きくなります。
Specifies the parallax. The further to the right, the greater the depth and the more it pops out.
⑥高低差を何色で指定したかを選択します。今回は赤色を使ったので「R」です。
Select what colour you have specified for the height difference. In this case, "R" because red was used.
⑦立体視画像を生成します。
Generates stereoscopic images.
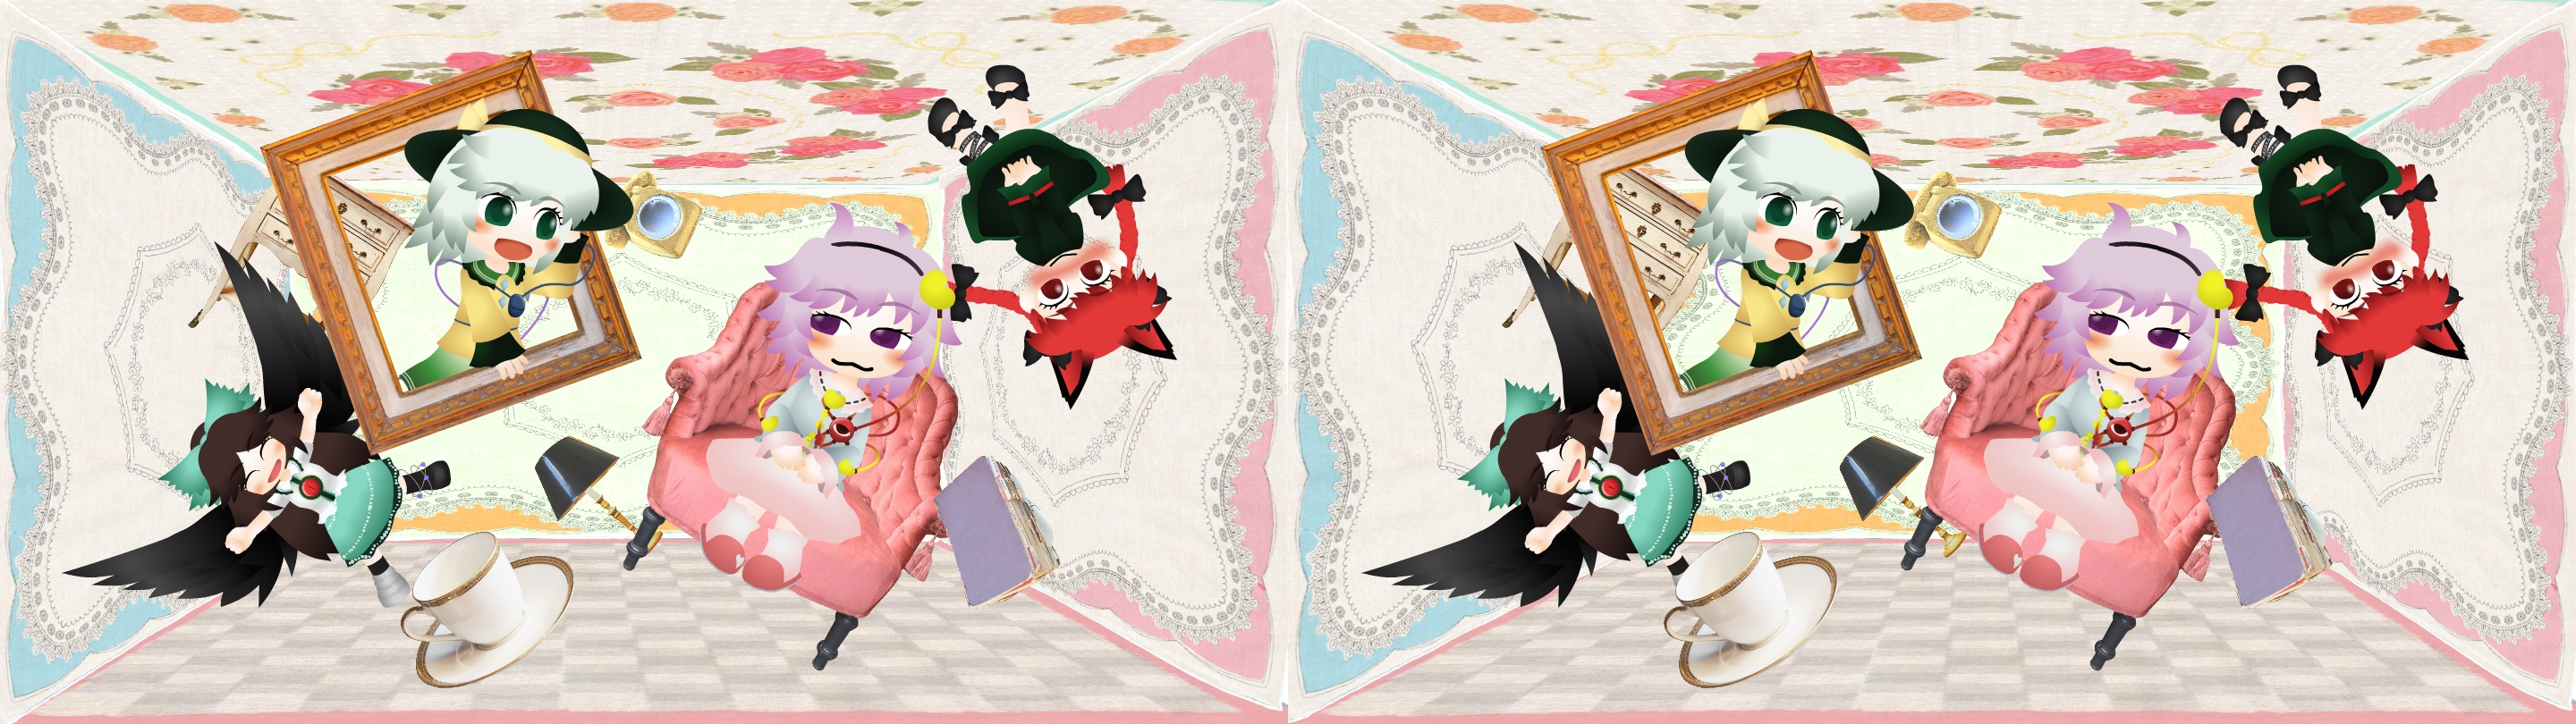
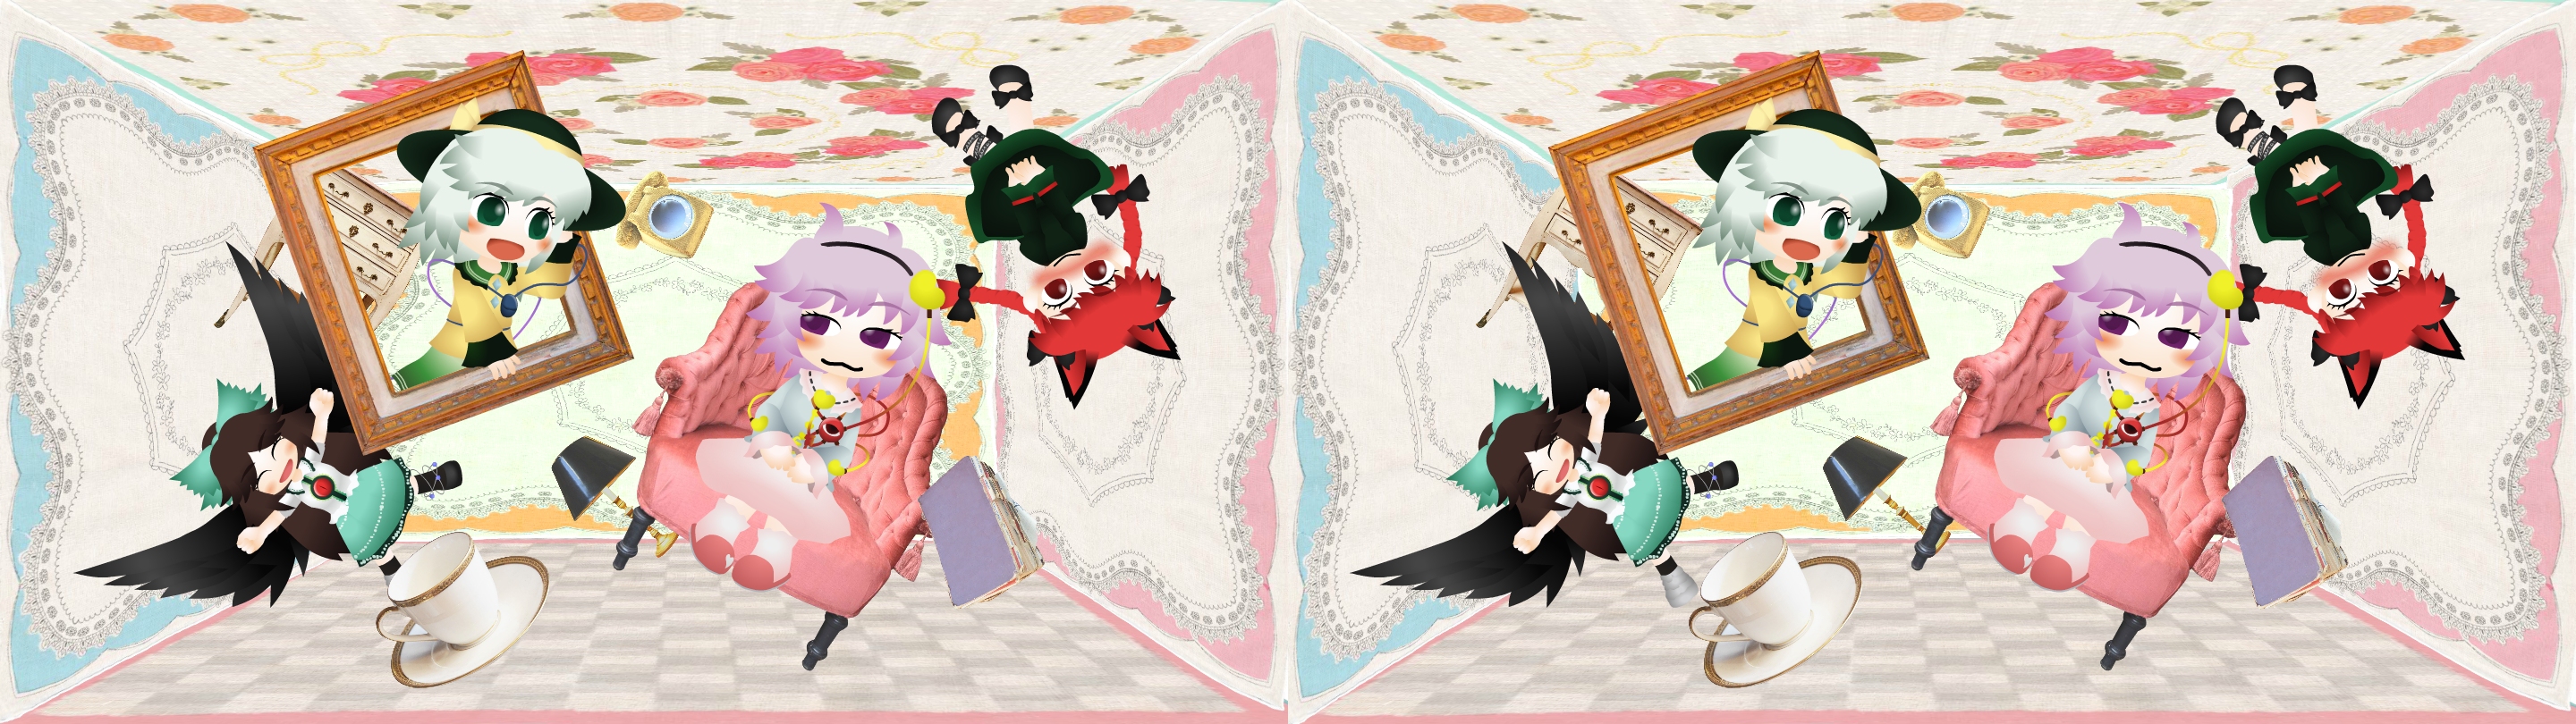
生成された画像です。左側の2枚は平行法、右側の2枚は交差法で立体視することができます。
Generated images. The two images on the left can be stereoscopically viewed using the parallel method and the two images on the right using the crossed method.
このままでも良いのですが、よく見るとキャラクターの周囲などがボヤけてしまっています。1枚の絵から視差のある画像を生成しているので、どうしてもこうなってしまうんですね。なので、この画像を下敷きにして、元の絵を修正していきます。特に難しいこと(高低差をグラデーションで指定するなど)をしていなければ、キャラクター等の配置を左右にずらす程度で済みます。あとは、修正後の画像を左右に並べて配置すれば完成です。
You can leave it as it is, but if you look closely, you can see that the area around the character is blurred. This inevitably happens because the parallax image is generated from a single picture. So, using this image as a base, the original picture is corrected. If you have not done anything particularly difficult (such as specifying height differences with gradients), you only need to shift the placement of characters etc. to the left or right. Then, place the modified image side by side on the left and right, and you are done.
こちらは平行法用。
This one is for parallelism.
こちらは交差法用。画像の配置が左右逆なだけです。
This one is for the crossing method. The only difference is that the images are placed in opposite positions on the left and right.
高低差指定用の画像を作る必要はありますが、比較的簡単に立体視画像を作ることができます。ぜひお試しあれ。
It is relatively easy to create stereoscopic images, although you need to create an image to specify the height difference. Try it out!